Configuring a VideoRay Thruster
⚠️ Keep hands away from the thruster blades at all times. ⚠️
Connection setup
We will be using the mk1 test rig as our base to configure thrusters
-
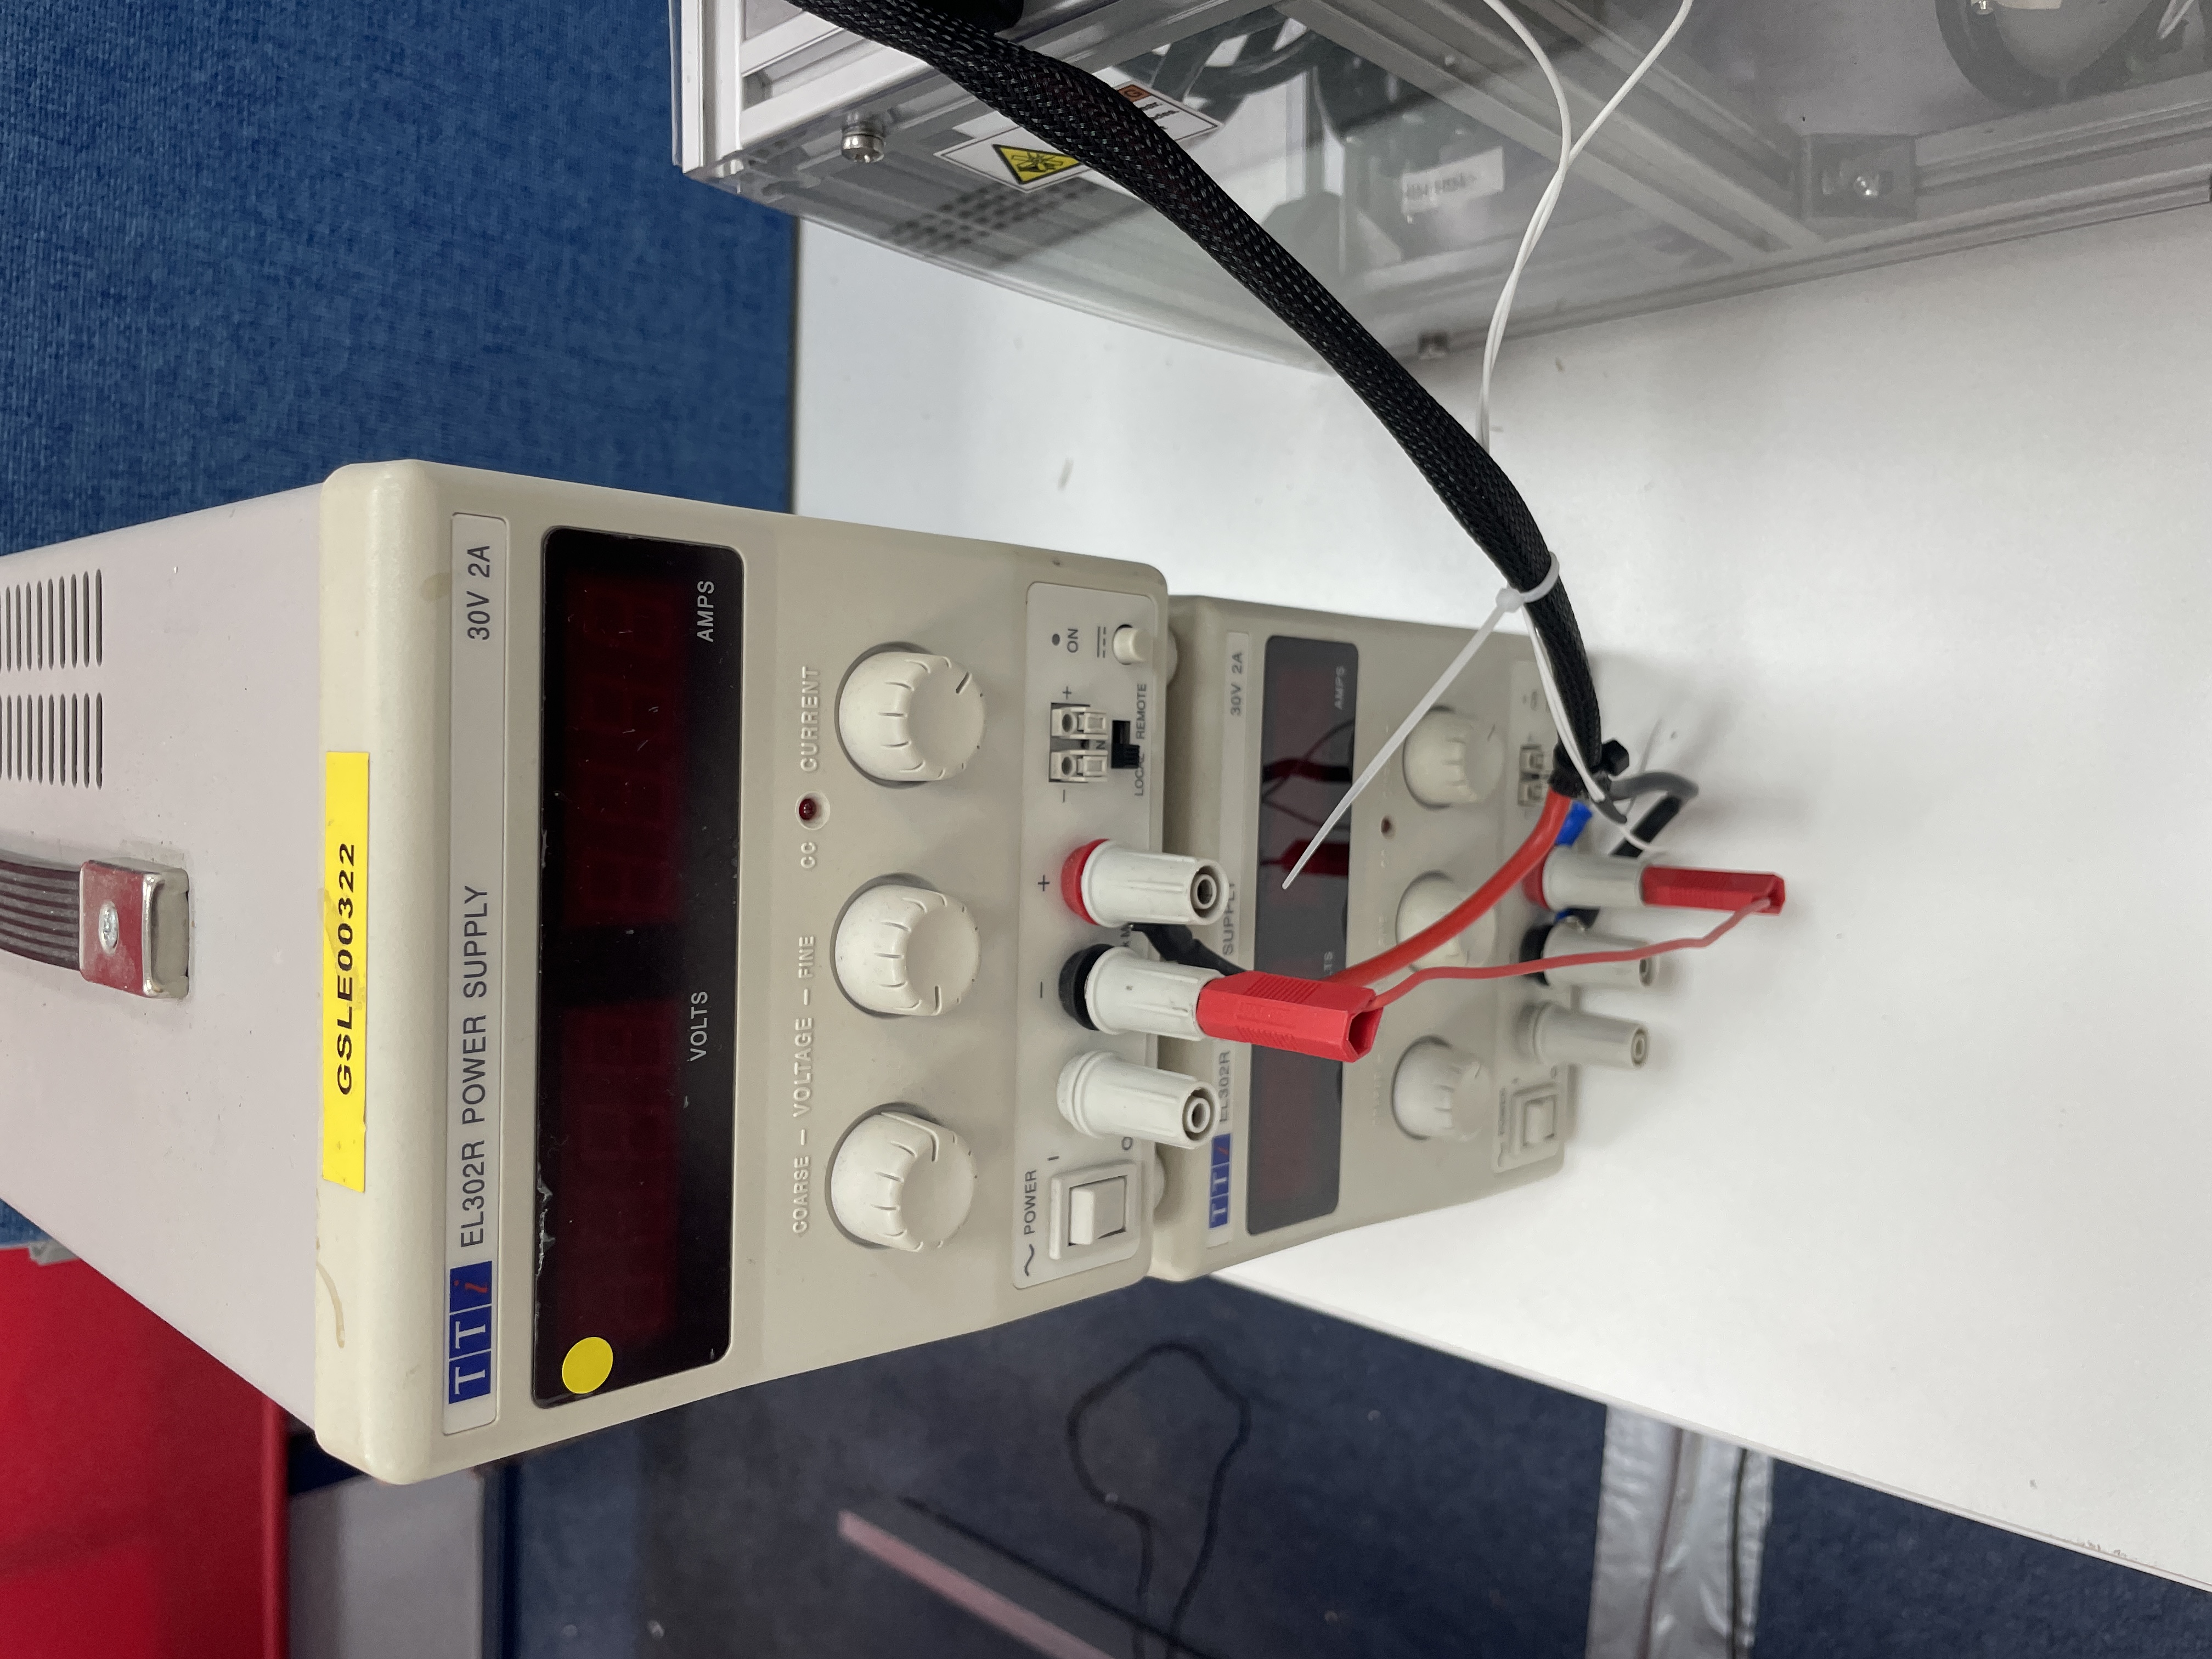
Switch off the test rig power supplies
-
Unscrew the bolts holding the perspex in place around the thruster end of the test rig
-
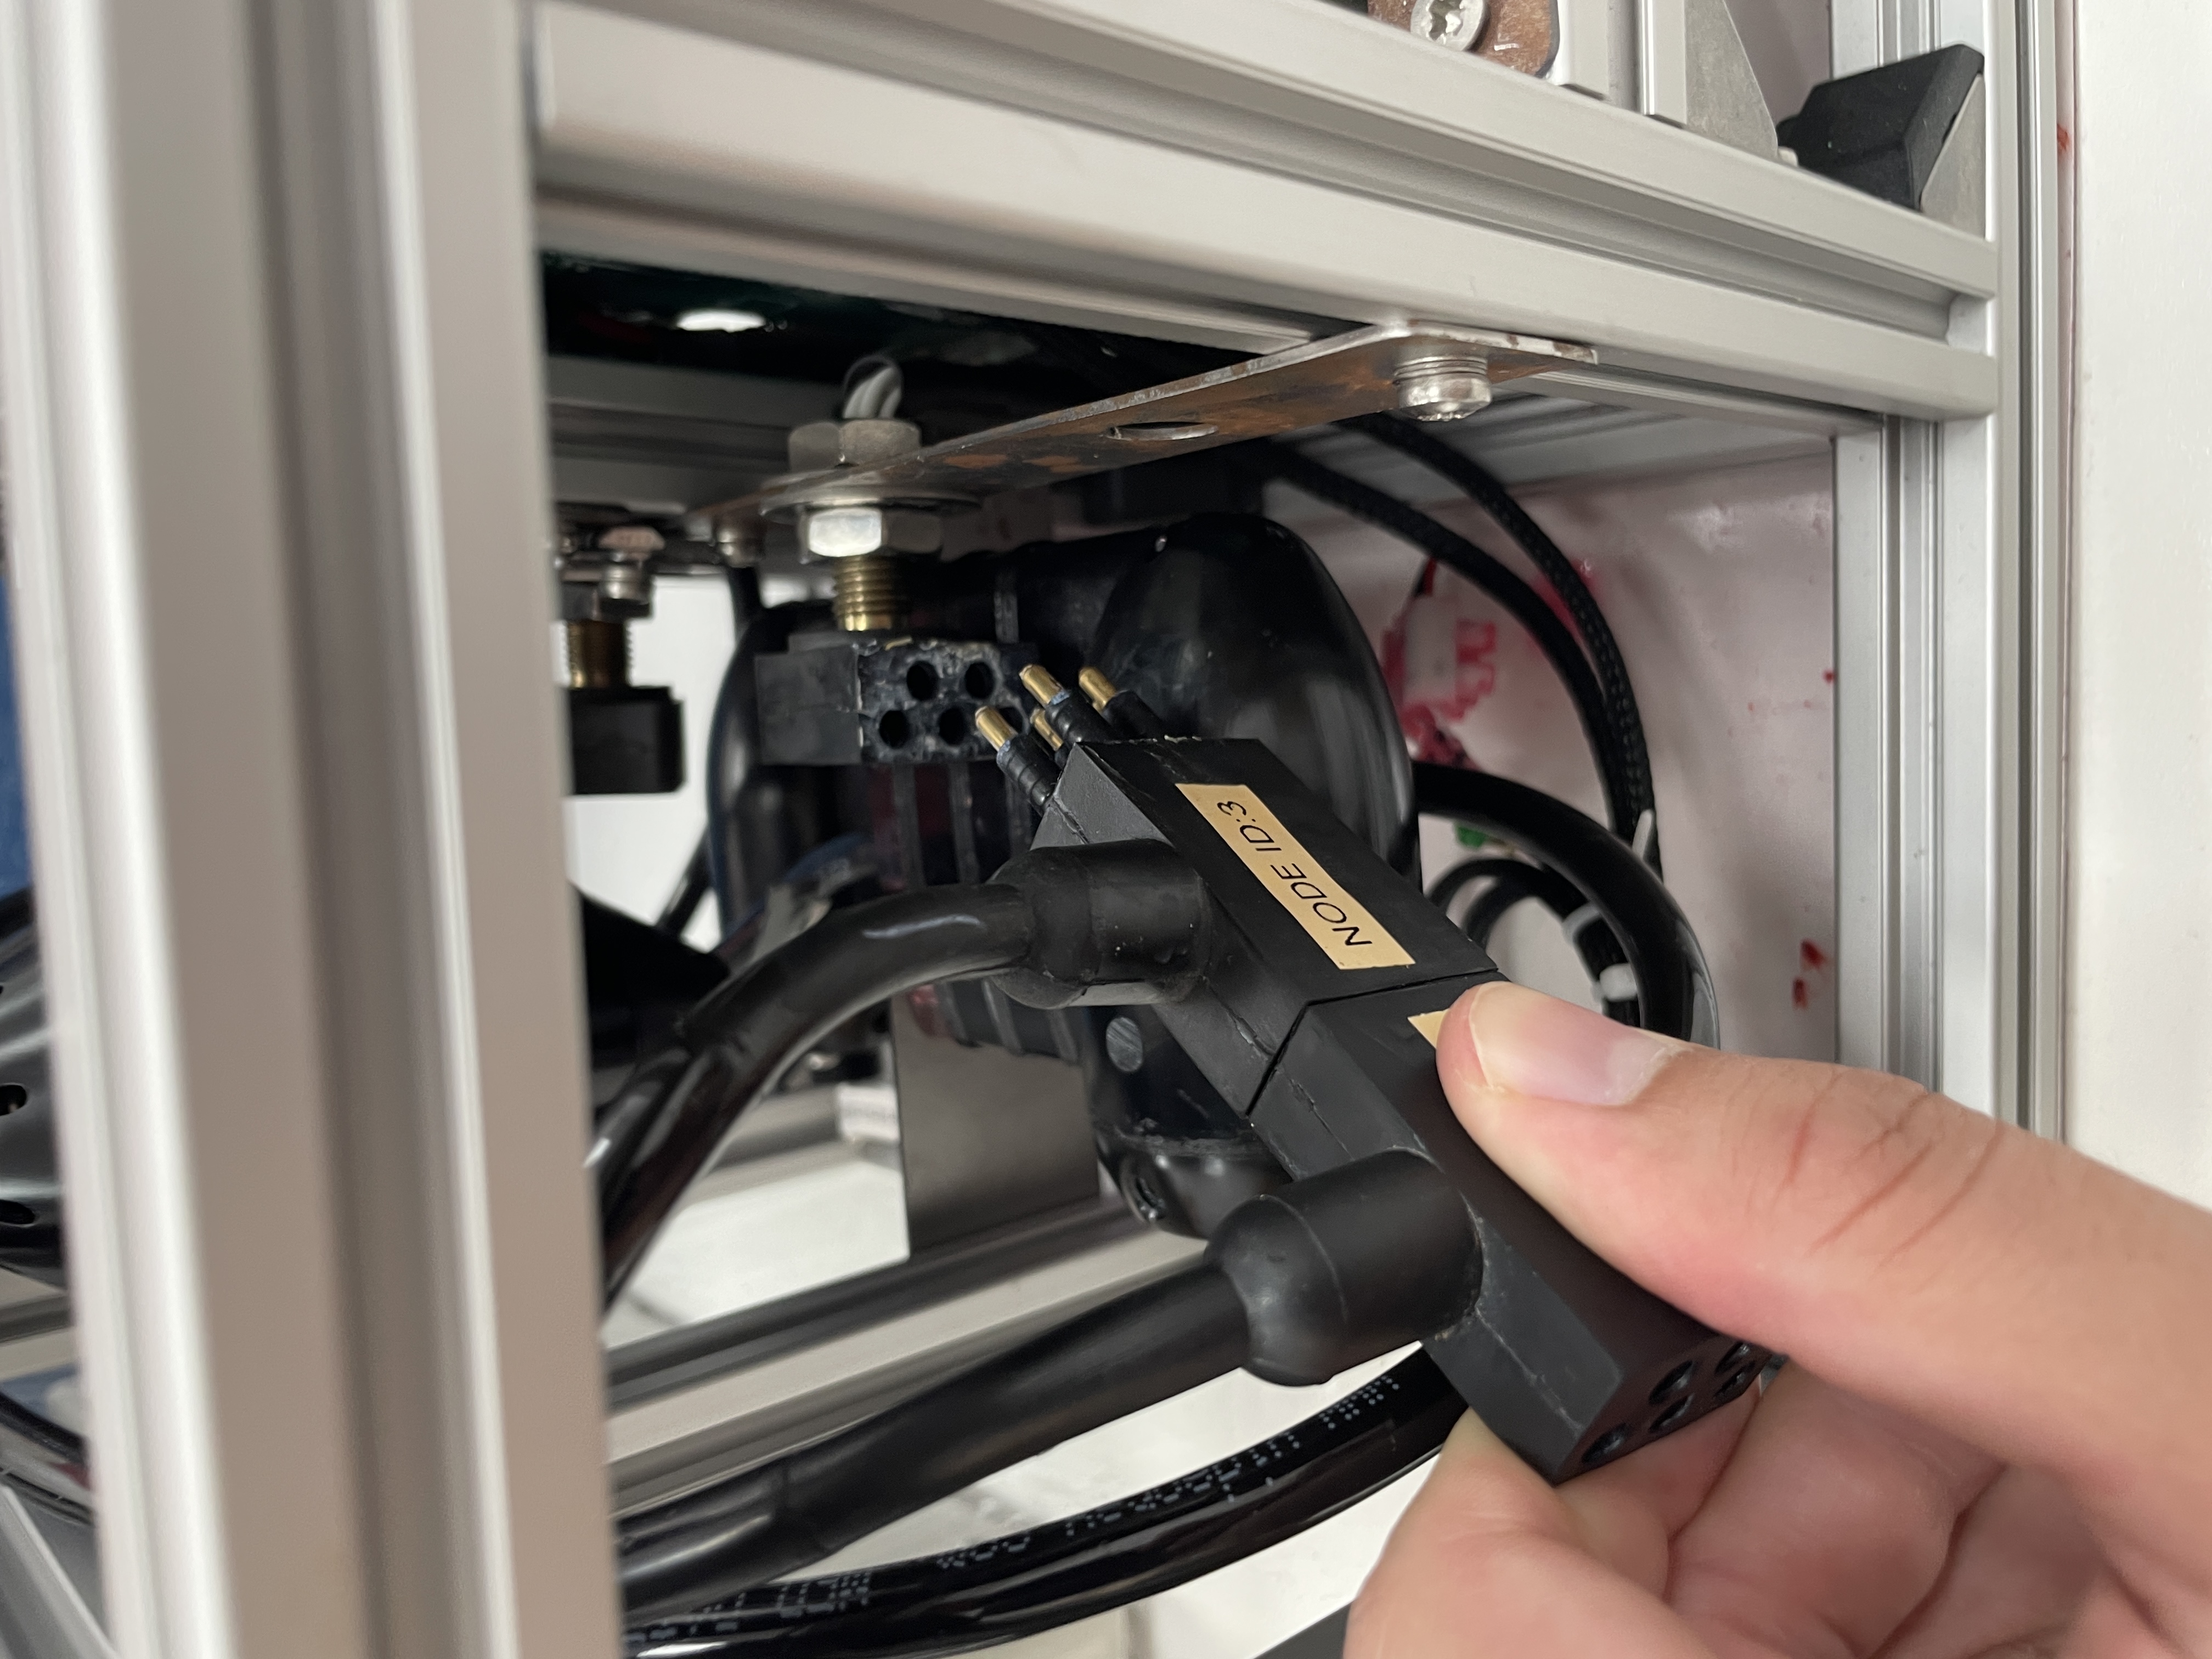
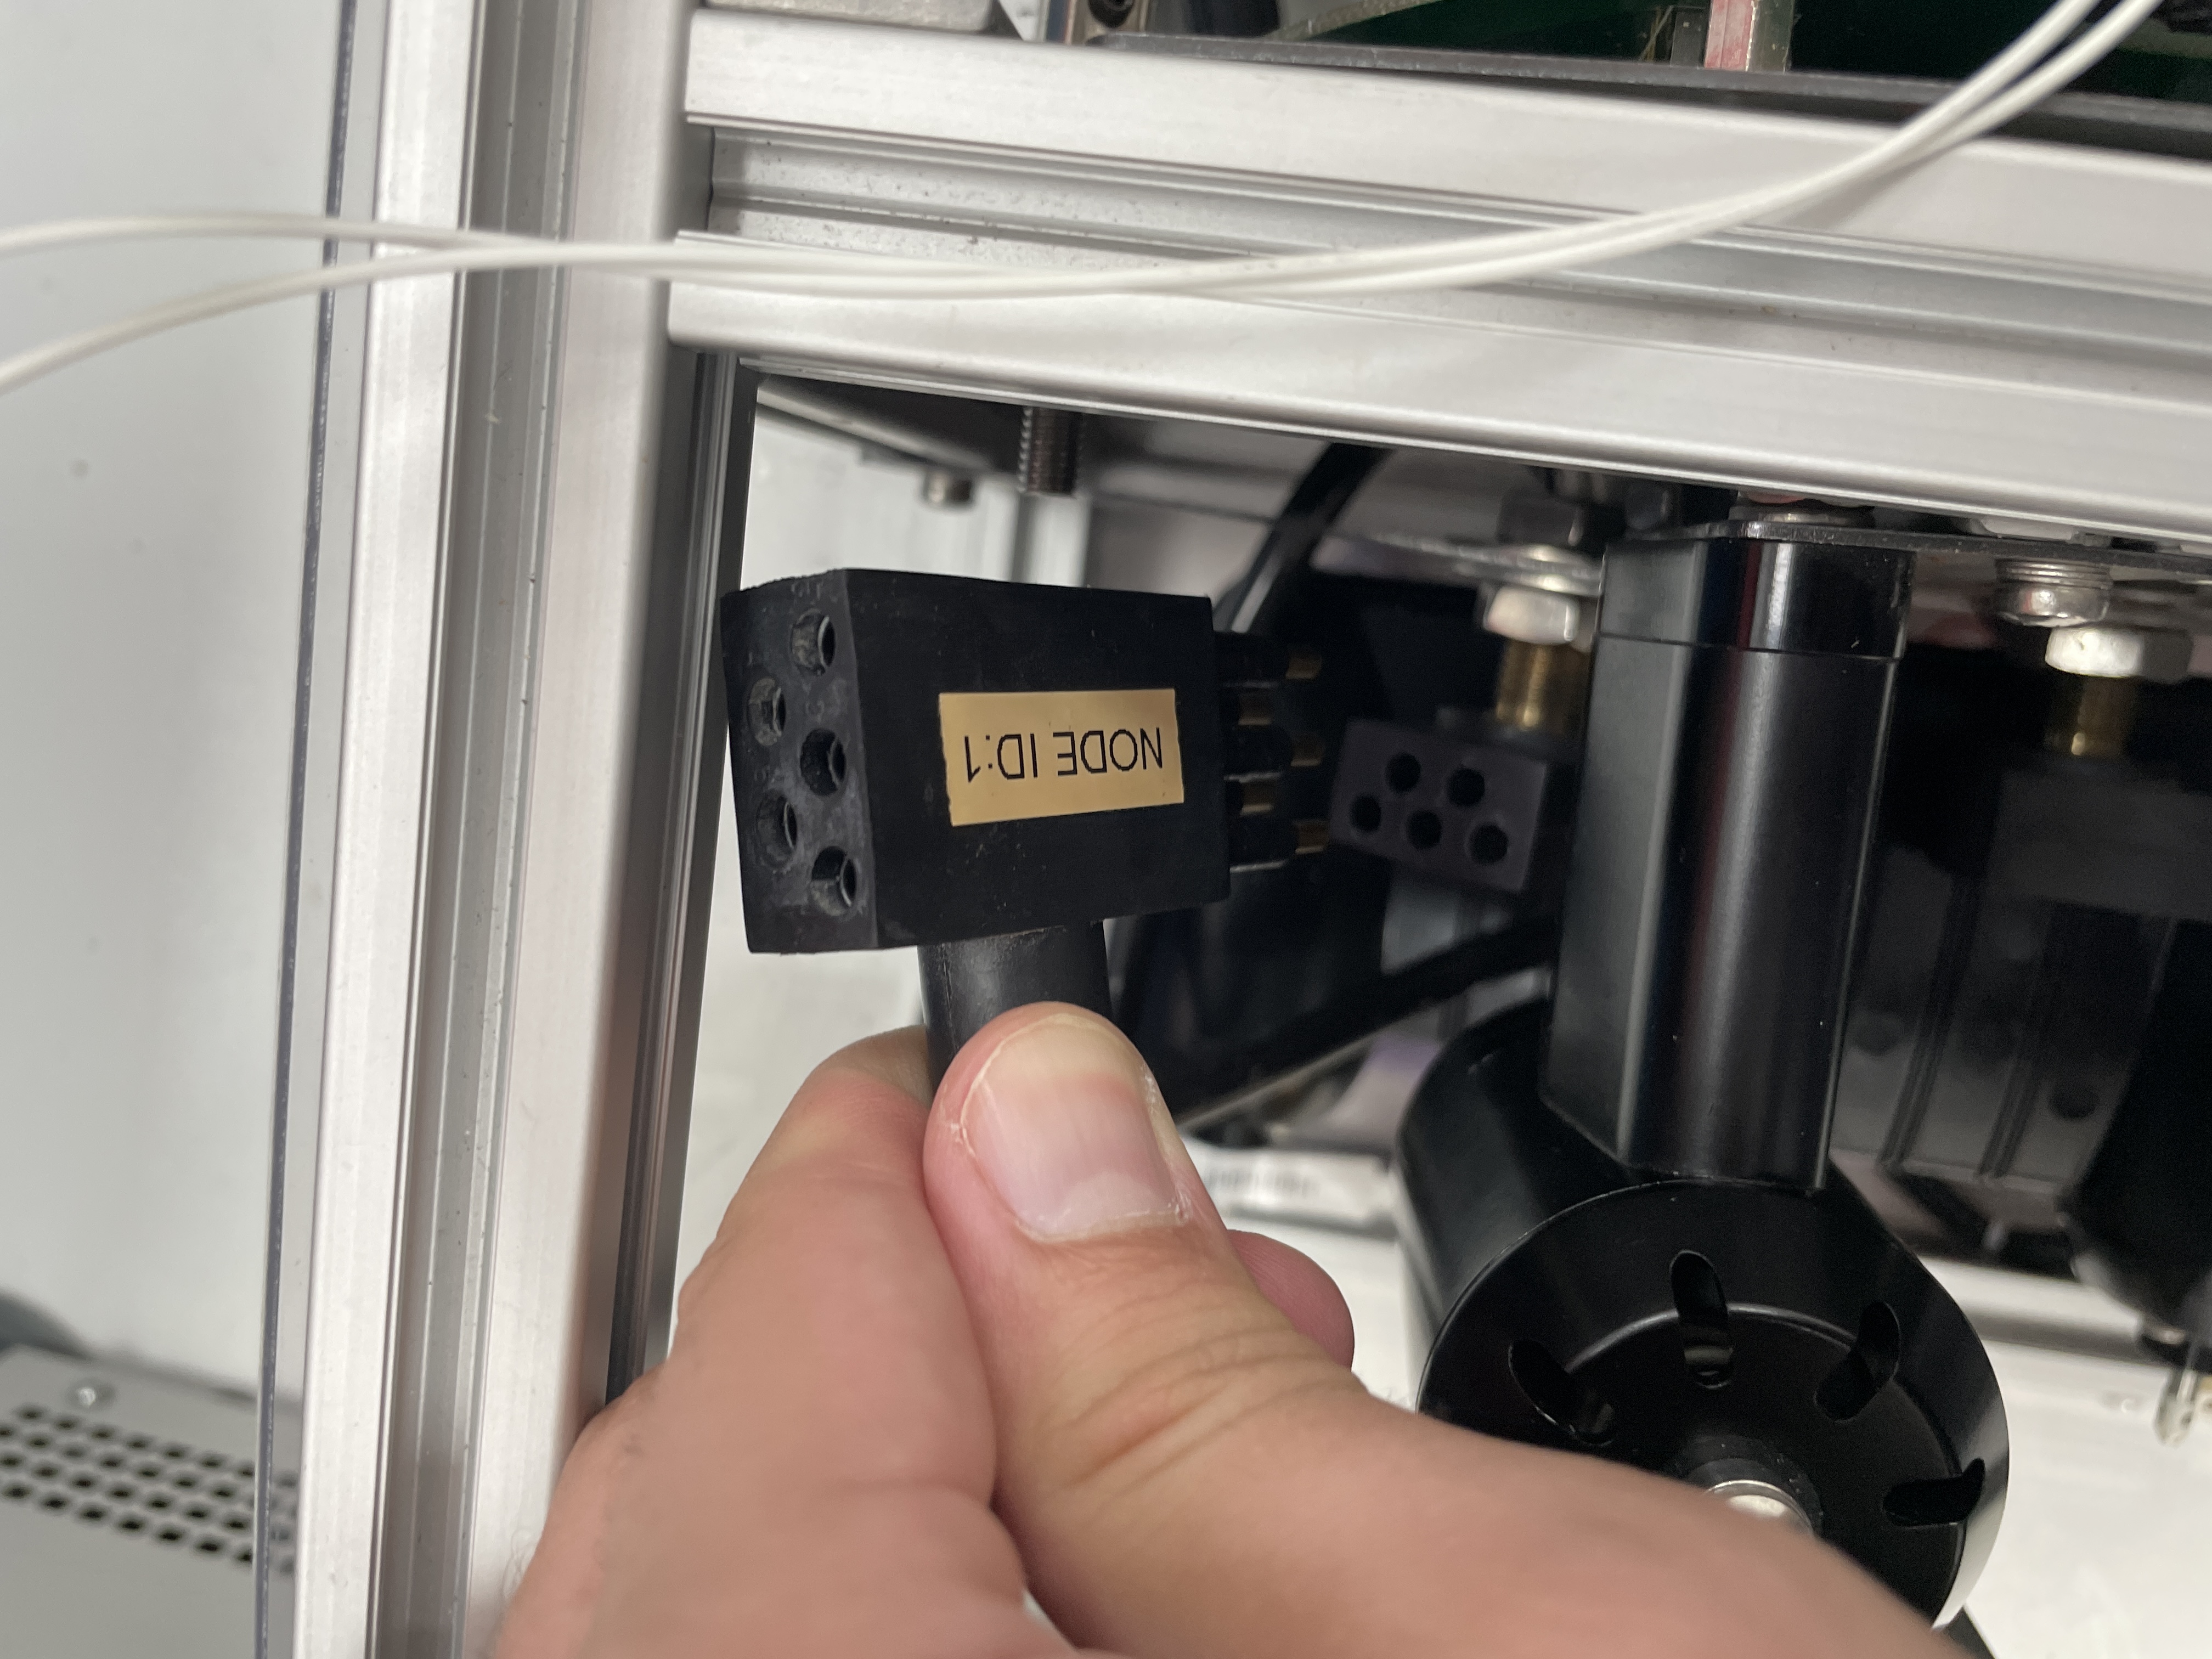
Physically disconnect all thrusters
a. (We do this because we have one serial line - comms will get muddled if we try to configure two thrusters at once.)
b. There are two connection points mounted to the frame, one will have one thruster connector plugged into it, the other will have two thruster connectors plugged in - stacked on eachother.
-
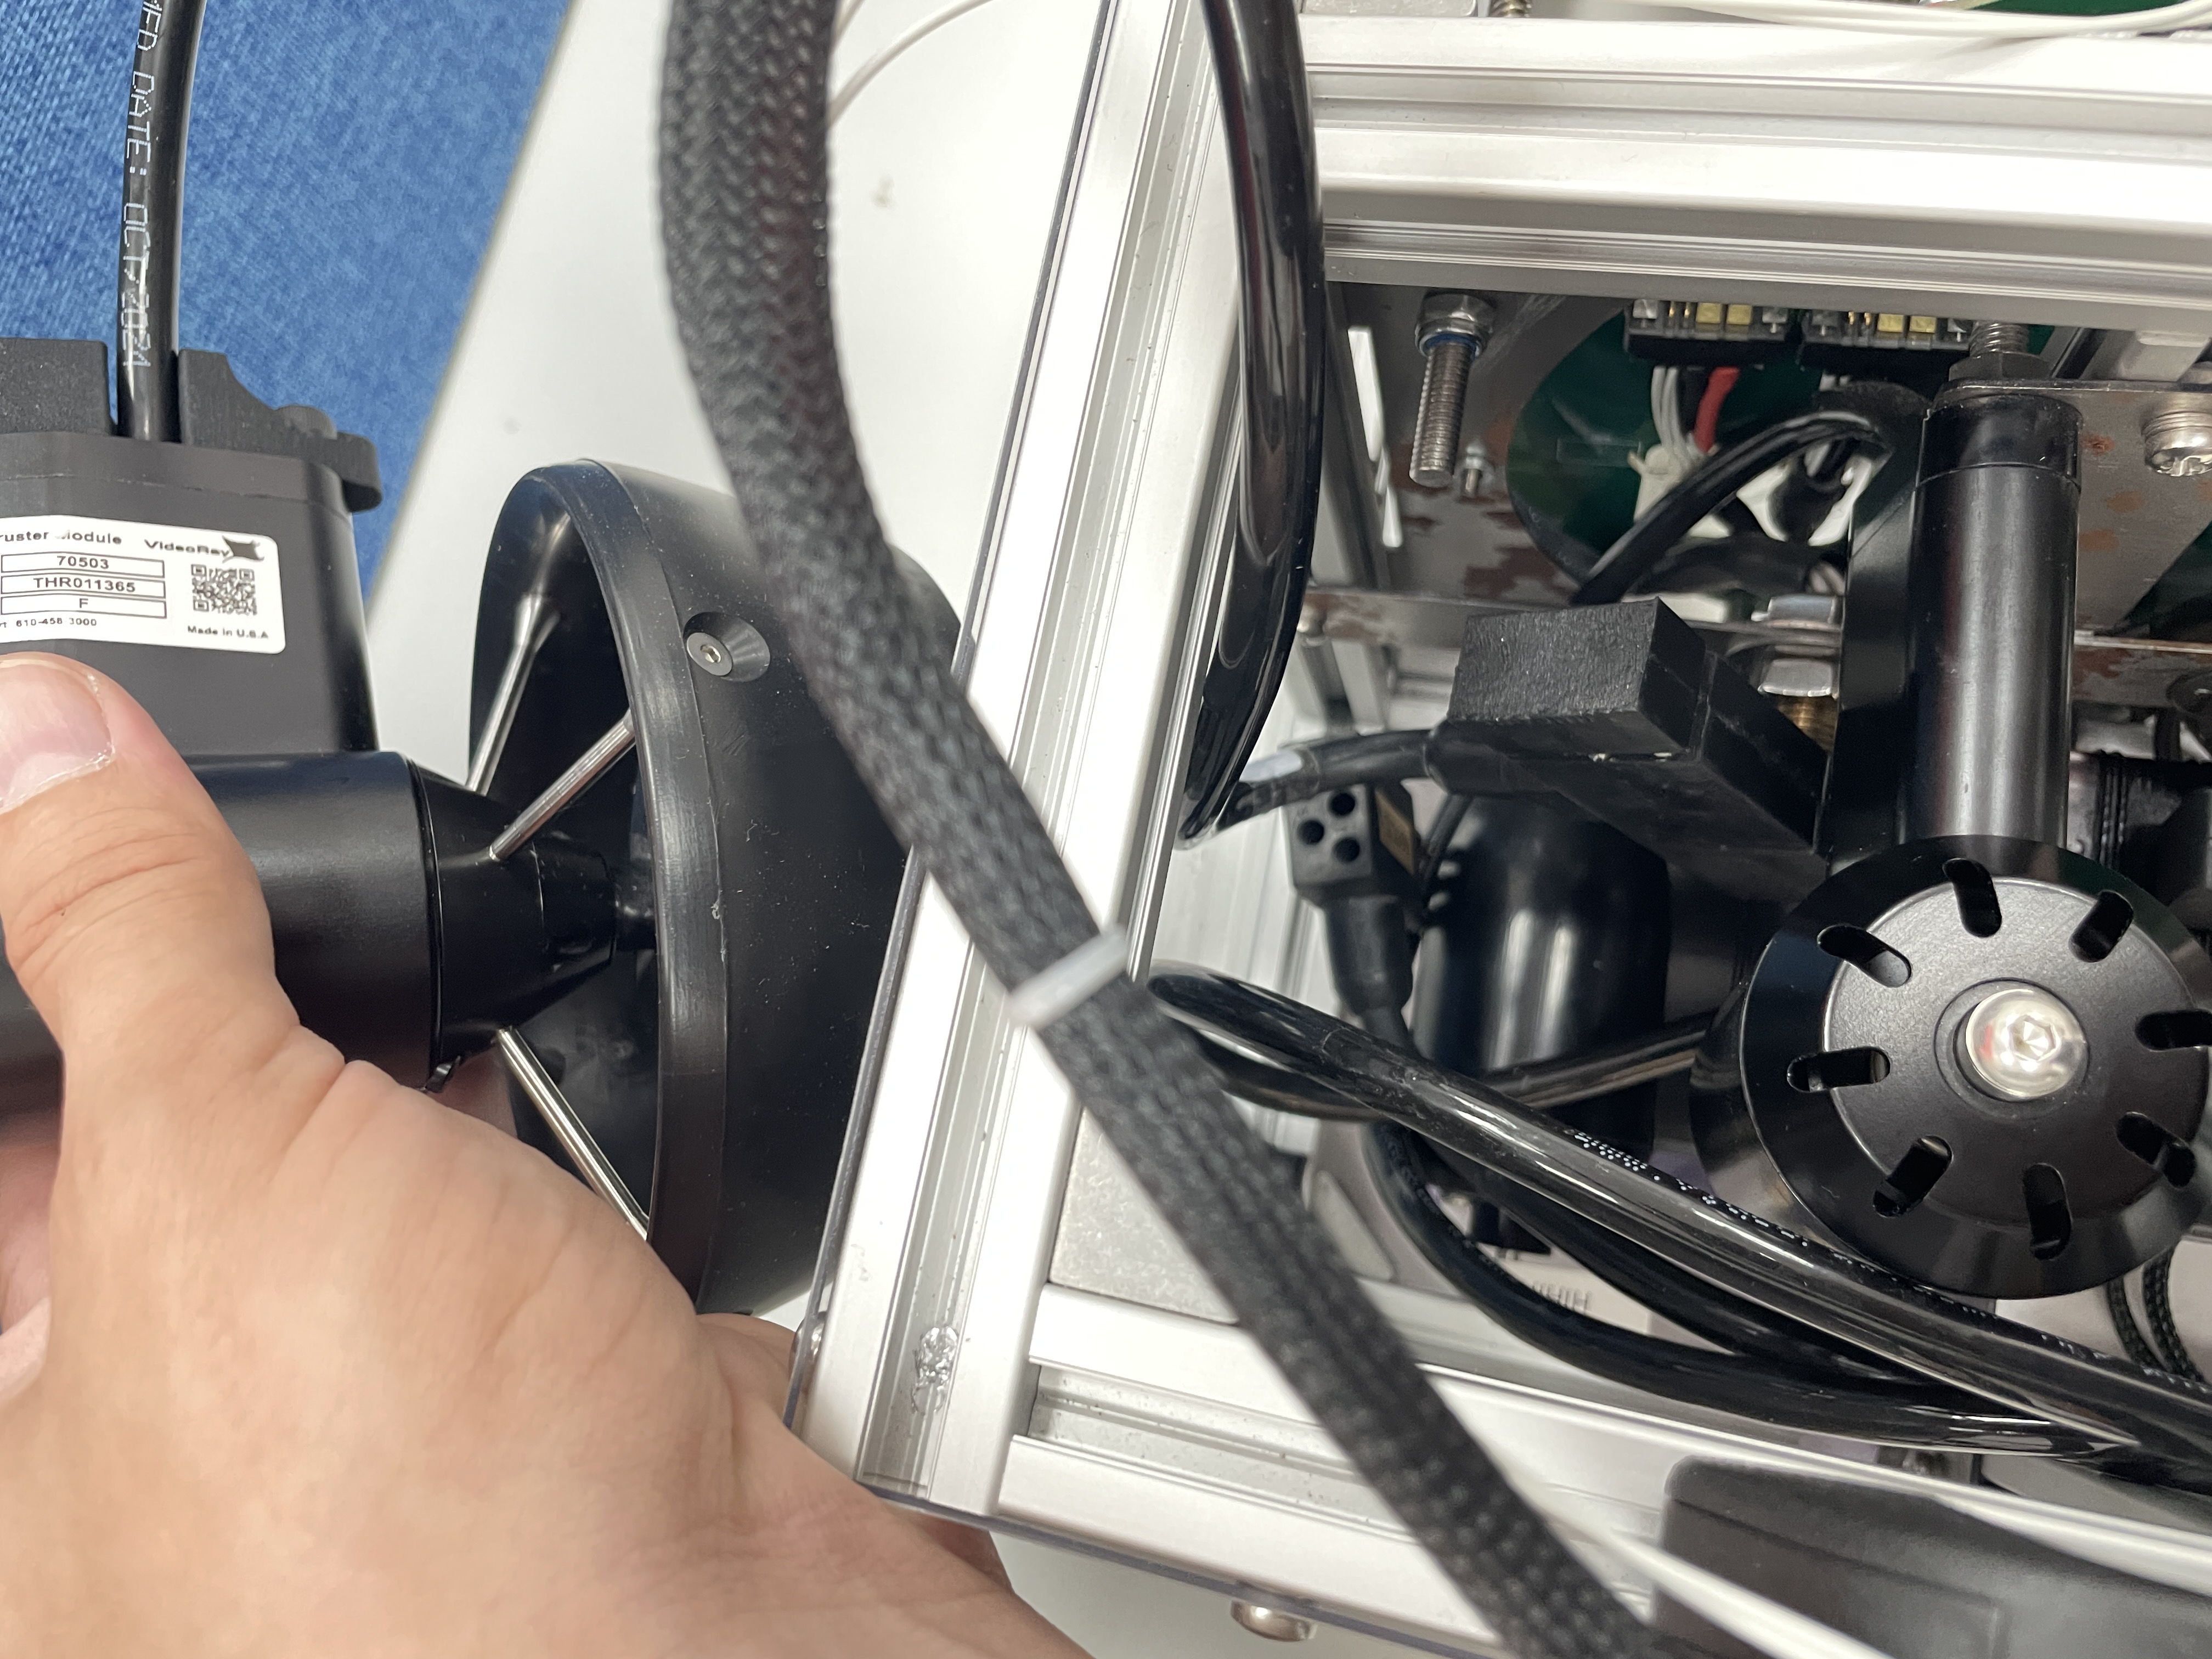
The three original thrusters should now be unplugged. Take the thruster which needs configuring, and plug it into one of the now empty ports on the test rig. Either one is fine.
-
Turn the test rig power supplies back on
Connection complete.
Onboard the mk1 test rig computer
We will now log into the mk1 test rig and use the raspberry pi to configure our connected thruster
Please ensure you are on the ARL building Wifi. (You probably are)
Note: For any grey block of code in this guide - there should be a copy button on the right of it. Then use ctrl+shift+v to paste into a terminal. Rather than having to type it out.
-
Open a terminal a. On Windows - Powershell, Command Prompt or Terminal are interchangeable programs.
-
Into the terminal enter:
i. If that fails, try:
or:
a. And press enter.
b. You may be prompted by an ssh trust request. Type yes and press enter.
c. You will be prompted for a password - please request this from any member of the software team
Hint: Another word for our flying vehicle. Four letters, all lowercase.
Note: Provided that you have Windows 10 or later, this should work without any setup.
-
You are now logged in to the test rig Raspberry Pi computer
-
Into the terminal enter:
You should see this message:
Opening serial port /dev/ttyUSB0 at 115200 baud...
Configuring GPIO 18 for thruster power...
Power OFF (waiting 2.0s)...
Power ON!
Motor Controller: THR011365 SW Version: 1.5.4 Feb 13 2020 16:09:22 1: Motor control flags: 0x0 2: Reverse rotation: DISABLEDetc...
-
You are now in interactive config mode on the thruster, currently being shown the current config values.
a. If you get a warning about failing to enter config mode - please press c followed by enter. You should then enter config mode.
NOTE: The script has a bug which shows you double of every character you type. This is a visual bug, only one is being sent to the thruster. Please ignore it. I have tried fixing it to no avail.
-
In order to change a config value - type its number e.g. 29 followed by enter, then the new value to be set. e.g. 1 followed by enter.
a. Please set all values to match the image below.
b. Not all values will need to changing. Probably just rows; 1, 17, 25, 29, 30, and 32.
c. Not all thrusters are identical, please match all values in the image below EXCEPT from the values in the table shown here. Config rows 1: and 29: should be set according to which thruster is being configured in the current moment.
Param Port STBD Vert 1: Motor control flags 0x0 0x1 0x0 ... ... ... ... 29: Node ID 1 2 3
e.g. if setting up a Port thruster, then set value 1: as 0x0 and 29: as 1
Note: row 2 is a subset of Motor Control Flags, let row 1 define row 2.
For all other values, match this image:
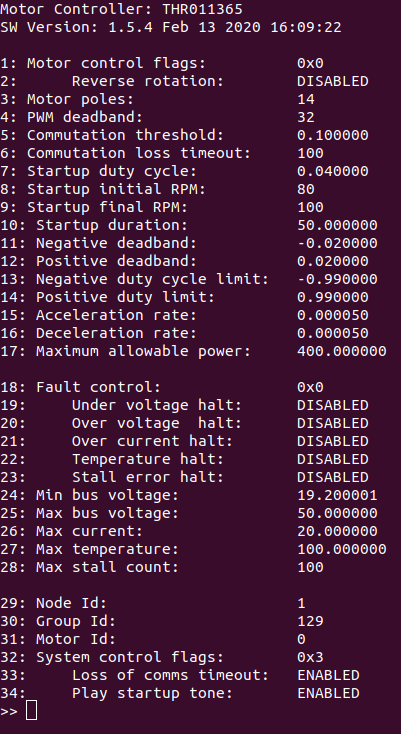
- Once you are done configuring - type "s" followed by enter. Then "x" followed by enter
Optional - Testing the thruster
-
We have now exited configuration mode into diagnostic mode. Here we can test the thruster.
a. Only do this if you would like to test moving the thruster.
⚠️ Ensure nothing is within the thruster blades. Including any fingers. ⚠️
⚠️ The thruster will spin up in the next step. ⚠️
- To test the thruster type "1" or "2" and type "0" to stop the thruster.
Exit
-
Exit diagnostic mode by typing "x".
-
Now press ctrl+c to exit
a. Now switch off the flight computer with:
Enter the password if prompted.
Configuration complete - repeat all instructions for each thruster required.
If you are finished - turn off the power supplies, reconnect the original thrusters, screw the perspex back on, and switch the power supplies back on.